Friday, April 20, 2007

Crop Nite - Mini Drawer Set

Last Friday was a blast! Nothing bad happened (Friday the 13th) but oh so much good. Went for Shabby's Crop Nite and there was a project planned for us all to do. I didn't think it would take the whole night to complete the project tho so I had brought other projects of my own. Little did I know...hehe. We started with this...


Progressed on to become this...


And after much cutting, sticking, hole punching, eyelet setting and err...knotting (I had lots of help with this last bit cos I was in a real hurry to get home...overflowing milk ducts will do that sometimes) the end result...


I've not started on the embellishments for the drawer set yet. So its still sitting on my desk at home. It is meant to sit on my office desk and store paper clips, my tiny eraser, staples, and err...more paper clips. Ok alright I confess...it is meant to be a brag piece to my colleagues. So after its has been viewed several times, it can come home and be more useful in storing my brads, eyelets, flowers, etc, etc. :-)

I think this was the first time that I had been to Shabby's and left without a shopping bag. Seemed strange but then, I had only just been there the Tuesday before...hee. Thanks again Shabby for the great time, great company, great food (loving those sandwiches Princess) and great SWENSEN's ice cream. [edit - Thanks must also go to the 'K' cousins who helped me take the brilliant photos of my drawer set in progress - Cheers!] Until the next crop nite.....

Thursday, April 12, 2007

H's farewell party and gift

Friday 6th April 2006 was the date for H's farewell dinner. Organized by JG and a good time was had by all. The food was yummy...well it looked yummy but I'm sure it tasted yummy too. It was Good Friday and a 'no meat' day for me so I didn't have any but pictures had to be taken. Maybe a food LO for H to commemorate that night?? Hehe. There was coffee lambchops (I may go back to try this dish), butter prawns, juicy looking chicken and my all time favourite, the salad cakoi with stuffed prawns!! Drool. (N.B - Panda you probably recognize the food eh)


So after dinner, H was presented with his farewell gift made especially by JG, who has so generously allowed me to post pics of it here. Thanks JG. Below is just a teaser actually as I need to wait for The Hubby to edit the photos for me properly to show the whole LO. But suffice to say, I think it looked great and it allowed the colleagues in the office to post farewell notes for H which he can remember 4eva.


The coloured cardstock was made to resemble little Post It notes. Brilliant huh! They were attached to the LO with brads and looks so real. Loving the idea JG!!

Friday, April 06, 2007

Maya Angelou


When I was in University, I picked up a couple of books by Maya Angelou and was immediately hooked. They were a series of autobiographical books and her prose really touched me.

I found this poem/quote by her on a birthday card belonging to one of my colleagues who had it displayed on her desk and it really touched me particularly at this stage in my life. I was thinking of using the quote in a LO to remind me to basically LOVE LIFE!!

Love life,

engage in it,

give it all you've got.

Love it

with a passion

because life truly does

give back;

many times over,

what you

put into it.

by Maya Angelou

Tuesday, April 03, 2007

Mini Accordion Album - Part 2


Finally finished the mini album I made at Shabby. Don't mind the shoddy photos...hehe was in a hurry to take the pics and get to bed. I love the embossed paper so much that I was loathe to cover it with too much stuff. There wasn't much space for journalling so I had to hide them behind the photos.


I printed the photos with my Epson R800 photo printer on glossy paper and I was surprisingly pleased with how it turned out. And yes, by that, it means that I have had the printer for almost 3 years (bought from Challenger, Singapore) and have hardly used it. Hee. Unfortunately, I didn't count on the ink of the photos coming off when in contact with even the slightest sticky substance. Aarrgh! I only realized this when I put a rub-on on one of the photos and got a really distressed effect. Haha..it is rather cool actually but the ink also came off when it touched the glazed chipboard pieces on the opposite pages.


Album Materials: Patterned paper: K & Co; Ribbon: American Crafts; Chipboard.

Materials: Textured Cardstock: Bazzill; Patterned Paper: Chatterbox; Chipboard Tag, Glaze and Acrylic paint: Making Memories; Tab die-cut: Quickutz; Sticker: DCWV Quote Stack; Tag Template.


Materials: Shaker Box: Carolee's Creations; Chipboard Flourish, Acrylic Paint and Glaze: Making Memories.

I matted the shaker box on cardstock to match the photo mat.


Materials: Rub-on: Deja Views; 3-Dimensional and Quilled Safety Pins: Stand-Outs by Provo Craft; Die-cut Tab: S.E.I


Materials: Textured Cardstock: Bazzill; Metal Tag: Scrapping Gals; Twist Tie, Chipboard corners, Acrylic paint and Glaze: Making Memories; Die-cut Alphas: Quickutz (Studio Skinni-Mini).


I had a good time making this mini album and very quickly, I managed to record Jay's birth details (on the 1st hidden tag) and the 1st thing people said about him when they saw him (on the 2nd hidden tag). Achieving this has inspired me to create more mini albums to record particular events rather than doing pages and pages. What I figure is great about mini albums like these are that they are very portable (for showing off...hehe), take up very little space (unlike those big 12x12s) and we don't really need lots of embellishments to fill up the spaces, meaning to say less time required and....dare I say it...less spending on new supplies...probably NOT!!! Haha.

Sunday, April 01, 2007

Check out Laine's Papeterie online!

For all those who used to, and still do, scrapbook shopping whenever you go to Singapore, I'm sure you've all been to Laine's Papeterie in Wheelock Place (3rd Floor same as Birkenstock). Well check it out...they now have a website and best of all...a blog that will showcase all the new and exciting arrivals that they get every week. Imagine that...new scrapbook stuff that comes in EVERY WEEK! Thank goodness I don't live in Singapore. I would be bankrupt in no time!!

Laine's really hip and happening now. I went to Singapore in Sept 2005 for a girly weekend and my ex-colleague who was there for the 2nd half of her patent drafting course showed me an article in SHAPE magazine featuring Elaine and Laine's Papeterie. Yup you read it right...SHAPE magazine...a mag for exercise and keeping fit that did a short review of a scrapbooking shop. And my friend who was into keeping fit and healthy bought the mag, showed me the article when I got to her room and I was at Laine's almost immediately. I must have spent like 3 hours in that shop and when I left, there was a $800++ dent put on my then basic credit card, I made instant VIP member with immediate discount given and made friends with Elaine and Sharon, who remember me...the girl from Brunei...whenever I visit the shop. Haha. On my last visit to Singapore in September 06, I even met Elaine at the Zoo and I was like gee who is this lady...look so familiar. Then when she says hello and asks if I've been to the shop yet...it clicked...oh ya...Elaine!!

I think my best visit was last year in May 06 when I was on transit to Cambodia. I popped into the shop with my trolley bag, told Sharon I only had 45 mins before I had to leave for the airport and still managed to leave with a $500++ bill and a super heavy trolley bag!! Whew...its a good thing their shop space is not that big else I might have missed my connecting flight. :-)

Newsletters from Laine's used to sign off with only 2 names (Elaine and Sharon) and now its signed off with 7 names. Its amazing to see how they have grown in just 2 short years! Not only that, they have a new space opening soon that's 1000sq ft big. I checked with The Dude and that's 2 and a half times bigger than my parent's den where we watch tv. Jazz...that's HUGE isn't it and can accomodate classes for 20 people!! I'm not entirely sure of the location of Laine's Designer Studio (somewhere in the east of Singapore or is there a mall called East?) but be sure that I will visit when I'm next in Singapore!

Wednesday, March 28, 2007

15% Storewide Sale at Scrapping Gals

There is an on-going storewide sale of 15% at Scrapping Gals which ends on the 31st March 2007. That's 15% off everything in the online store plus there is also a special Jolee's Boutique offer of buy 10 and get 1 free. Think I'll get me some Quickutz shapes. Hee.

If anyone wants to place an order with Scrapping Gals, let them know to send your order with Adeline's box (which leaves the 1st week of April) and what they will do is take off the shipping cost for your order so you will not be charged for shipping. When your order comes in, I'll give you a call to arrange a pick up of your order. Orders can be sent to Kuala Belait or Seria too if you live there since there is a SG Consultant there and they send boxes there too.

Mini Accordion Album

Last Wednesday 21st March, I attended the Mini Accordion Album class at Shabby Chic and had a nice time out away from home and the kids for awhile. The class didn't take long and my accordion album was finished in no time at all. This was my first class at making an album and hopefully it won't be my last...hint hint...star book anyone? :-)


The pages of the album was made from cutting a 12x12 piece of patterned paper into 2 strips and then sticking them together at its ends. The folds for the pages were made by scoring with a bone folder. Continuous Glue Lines adhesive (available at Shabby) was used to put the whole album together. The pages of the album was made from embossed paper and is perfect for a children album.


The covers for the album was made by using 2 pieces of 6x6 chipboard and covered with a different patterned paper. Shabby told me that the chipboard can be bought from Bismi or Active Art.


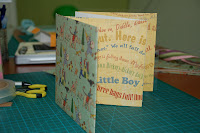
Below is the front of the finished album with the pages opened.


Ribbon (American Crafts) was stuck on the back cover of the album and the back page was then stuck over the ribbon so the album can be tied close using the ribbon. All materials were provided by Shabby including the pre-cut chipboard covers which made assembly of the album really fast and easy. Plus we could choose a coloured cardstock for matting our photos. I chose red but have yet to put my photos in. So watch this space for photos of the fully completed work. Hehe.


A big shout out to Shabby for letting me do the class on my own cos I could not find anyone else to go with me on a Weds afternoon and the minimum for the class was 2 persons.

Tuesday, March 13, 2007

Mad Dinosaur Weekend

Ty had a long dinosaur weekend last week. It started with Jurassic Park:The Lost World on Friday night. He was fascinated with the dinosaurs as we've been reading about dinosaurs recently. He could not get enough of the T-Rex, Brachiosaurs, Triceratops and Raptors. On Saturday afternoon, he watched the repeated show and after it finished, he kept asking for "the dinosaurs". Then on Sunday night, Jurassic Park (the first instalment) was shown and wow did he love it.

After what was probably a dino sensory overload, it was still not enough. When my mom told him that he should eat more so that he can grow up to big and tall like his Papa, he said, "No, I want to grow up big like T-Rex". Oooeer...I think that could be a little too big for my liking but maybe its ok so long as his teeth don't grow to be as sharp. Hee.
Then yesterday, as we were getting ready to go to school he started telling my mom that the dinosaurs will eat Nana (my mom), Yeh-yeh (my dad), Ah Ku (my brother) and Aunty Lee (my mom's maid). So then my mom asks what about him and mummy (that's me) and he said, "Me will fight the dinosaurs like this". And he starts waving around a....bicycle pump! Oh yes...the most effective weapon against big scary dinos. Ty my saviour! Hahaha...what a scrapbook moment is what I say!

Sunday, March 11, 2007

Chipboard Flourishes!

Confinement for me ended on the 24th February 2006 but I've hardly been anywhere, being stuck at home with an infant, a toddler and no maid. But really, going out with both boys on my own just doesn't appeal to me right now.

But on Wednesday night, news of Shabby Chic's new chipboards arrival was posted on their blog and all of a sudden I really needed contact lens solution from Standard Optic at The Mall...hey The Mall...isn't that where Shabby Chic is...hehehe. Made a mad dash there on Thursday afternoon with only a window of an hour cos my mom, who was babysitting, had an appointment. And look at what I bought...not a lot lah. Don't worry Hubby dearest...really not alot.

But yeeeaaa I finally got my hands on the Fancy Pants Biggest Board Chipboard Flourishes. I've always admired how Ruey uses flourishes and swirls on her LOs. They look so great. I got myself two Chatterbox mini albums for brag books. Can't wait to get started on them when I get back home on Tuesday.

Thursday, March 08, 2007

Crop Nite at Shabby Chic

Shabby Chic had its first Crop Nite on Friday 2nd March and I think its safe to say that all had a great time! It ran from 6pm till 9pm and to be honest I didn't get much done. Was really busy chatting and being a general busybody into what everyone else was doing plus this was my first visit to Shabby since I got my 'get out of confinement' card last week and it was pure joy for me to be able to browse around the shop. Hee.

Team Harris below (see Black Diamonds for more) was really efficient and they finished a double LO properly within the given time.


Jazzscraps and I trying to focus on our respective projects...I think she managed to plan her LO at least. I only managed to cover an 8" chipboard letter H with pattern paper. I've got the big chipboard letters to spell 'HOME' and the instructions were to stick the patterned paper on the chipboard first and then cut off the excess with a craft knife. It was tough going tho cos I tended to slice up my chipboard edges instead. Jazzscraps then advised me to trace the outline of the letter on the paper with a pencil and then trim. Much easier and neater. I didn't even manage to put any embellishments on my letter. Hee. Luckily The Hubby didn't really ask what I had done at crop nite. I figure I can do another letter at the next crop nite. Haha.


What was the best part of the night...probably the shopping. Woohoo!!


Thanks Shabby Chic for the wonderful time!!

Wednesday, February 28, 2007

Tag You're It

I woke up on Tuesday and went thru the list of blogs that I regularly visit and saw that bling bling Black Diamonds (who does really great digital scrapping) got tagged. It was not an easy tag...I mean 6 weird things about yourself...wah that's hard! Then you gotta tag 6 other people. So there I was happily reading Black Diamonds' tag and making a mental note never to stand too close to her while she's drinking beer. At the end she tagged 6 people and strangely enough I saw my name. Now there are lots of other people out there with the same name as I, so being curious and wondering who this other person is, I clicked on the name and my blog page came up. HUH??!! Double check lagi and omigawd, she's tagged me. Alamak...6 weird things about myself...gosh...this is hard.

The rules are:

"Those who get tagged must post 6 weird things about themselves in their blog and state the rules clearly. At the end of the post, you must choose 6 other people to tag"
So here goes:-
  1. If I catch sight of a mosquito in a room, I will automatically start itching all over even tho I've not been bitten and won't be able to relax until the dreaded blood-sucker is squashed dead;
  2. My pillow is sacrosanct! No one is allowed to use it...yes not even The Hubby cos he has really oily skin and Ty is yelled at and shoved off each time he puts his feet on it;
  3. I'm very very and I mean very fussy with my bath towel. One side is to be used specifically to dry my hair and upper body while the other side must only be used to dry the lower half and God help anyone who messes with my towel (The Hubby and Ty included);
  4. When I buy toiletries, I buy in bulk to "keep stock". My bathroom is full of stuff like shower gels, face scrubs, body scrubs, shampoo. I do use them but once I get to the last bottle, it is always saved for a rainy day and ends up not ever getting used...sayang bah and so the collection grows;
  5. I like buying snacks, crisps and biscuits but never eat them. They get stacked up in a basket beside the tv until its long past their expiry date and then get chucked out by my really annoyed Hubby;
  6. I never open my mail. All my personal mail still goes to my parents house and my mom passes them on to me regularly. When I get home, they just get tossed into whichever pile is convenient until its spring cleaning time. And yes, this again annoys the hell out of The Hubby.

So there, 6 weird things about myself. Actually, I don't consider them that weird but The Hubby seems to think so. He is the one that listed No. 3-6 for me cos I really couldn't think of anything.

Ok so now I tag Jazzscraps, Sleepless, Scrappaway, Ruey, Pandachu and Mr. Pablo. Get to it guys! :-)

Friday, February 23, 2007

Rubber Stamping 101

Now I have to admit, I do not make a lot of projects with stamps and inks. I use my small collection of rubber stamps and ink pads sporadically. More often than not, my most active stamping period is the run up to christmas when I start to frantically hunt for and wrap prezzies while simultaneously making gift tags.

I like buying tools that can be used over and over again and rubber stamps are one of them. Unfortunately, I have found that rubber stamps can also be quite costly especially alphabet stamp sets. In the past, stamps are mounted on wood but nowadays you can get stamps mounted on clear acrylic, which makes the placement of the stamps so much more easier, or foam stamps mounted on foam pieces. I personally like Hero Arts for wood mounted stamps, Autumn Leaves for clear stamps which have to be mounted on acrylic blocks and Making Memories for foam stamps. You can get Hero Arts stamps from Creative Hands in Takashimaya, Singapore and Paper Arts in Hong Kong. Autumn Leaves clear stamps can be obtained online from Pictures 2 Pages in Singapore.


INKS

There are a variety of ink pads that are available and each of them allows you to create different effects/looks with the just one rubber stamp.


Dye Inks


I have several of the kaleidacolor ink pads as seen above (by Tsukineko). Got them from Creative Hands in Singapore. Each pad has 5 different individual colour pads mounted on a slider. With a simple push of the slider, the individual pads join together to make one large multi-coloured pad. Because dye ink is pretty fluid, it bleeds easily and the ink pad must be stored with the individual pads separated to avoid a mixing of the colours. I use this pads for making invitation cards and gift tags.

Dye based ink pads dry quickly and is not suitable for embossing work. They should also be stored upside down to allow the ink to move to the face of the ink pad.


Pigment Inks

Pigment ink pads are slow drying and good for embossing. The above Color It ink pad by Ranger Industries was my first ink pad ever. I bought silver and black from Inksquisite, the sister shop of Stamp It in Perth, Australia. I was recommended this particular pad as I wanted to to embossing for my church wedding invites. The Hubby and I made our own invites and bought all our supplies from Inksquisite. As first time embossers, the shop lady advised us to get a coloured pad as opposed to a clear embossing ink pad so that it would be easier for us to see the design we were embossing.

Pigment inks are rather thick and viscous and therefore not suitable for use on glossy paper. I didn't even dare to use it on vellum paper. Tsukineko makes all sorts of pigment ink pads with different uses.


Above is the Versamark Watermark ink pad. It is clear and when you stamp your image on dark coloured cardstock, it creates a watermark effect. You can also use it to create a resist image on paper, then dye or ink the paper. The dye or ink won't be absorbed into your stamped image making it stand out.


Opalite is another pigment ink pad which gives off a reflective effect. I have one Opalite pad but have not used it yet. Hehe.

The one type of ink pad that I do use quite often are the Versacolor and Versamagic pads. The Versacolor pads are the Tsukineko equivalent of Ranger's Color It pads and they look great when used on any color cardstock. Versamagic pads are a chalk pigment ink and it creates a chalky look without any of the chalky residue. I find that these pads don't work too well on dark cardstock though.


Solvent Inks

Solvent inks are permanent ink pads that can be stamped on anything from glass, wood, metal and leather. Refer to previous post 'Like Father Like Son' for more on this.


Distress Inks

Ranger Industries produce a great brand of distressing inks by Tim Holtz. I love these ink pads as they are fabulous for inking the edges of your paper. I have about 10 of this range in different colours. Other brands like Making Memories also make distressing ink.


Embossing

This is a fun way to play with stamping as it gives your stamped image a raised and embossed look. You need to use pigment inks to stamp your image or a clear embossing ink pad, then pour embossing powder (see below) over your stamped image and heat with a heat tool.


You can also get tinted Embossing ink pads so that it is easier for you to see your image when you pour the embossing powder.

If you don't own a heat tool, no worries. Heat your image over a toaster (the sort that pops up) or put it near an iron. The heat from the toaster and iron will melt the embossing powder and give you the embossed image. When the Hubby and I did our wedding invites, we used a toaster cos the heat tool was not within our budget at that time. :-) What you must NOT use is a hair dryer as it blows out a lot more air that is not hot enough to melt the powder. You're likely to blow away your embossing powder. Hee.

You can get embossing powder in all sorts of colours as well as clear ones. Usual embossing powder is made up of tiny grains that looks rather like fine salt. Then you get Ultra Thick Embossing Enamel ("UTEE") which is about the same thing except the grains look like rough salt. UTEE gives a thicker embossing effect and if you layer enough UTEE over an image, you can 'crack' the UTEE to give the image a crackle effect.


Cleaning your stamps

After using your rubber stamps, it is best to clean them to avoid a build up of ink. This is also to avoid a bleeding of colour when you use them on other ink pads. I use the Ranger Industries stamp cleaner (see below) bought in 2003 from Inksquisite. A bottle goes a long way unless you use your stamps all the time. I reckon my bottle is still about three quarters full.


My stamp cleaner has a sort of rough-ish pad on top. All you do is squeeze the bottle lightly while rubbing the rough pad over your stamp, then just dab your stamp clean with a paper towel or tissue. It is best to also rub the top of your cleaner with tissue to clean it as well.


Now you can get stamp cleaners in a spray bottle which you can just spray on your stamp. Or you can get the scrub-it pad below which goes with the spray cleaner which is scented. Nothing like Chanel No.5 though.


Clear stamps

The popular take on rubber stamping nowadays are unmounted clear acrylic rubber stamps. These are excellent as they are flat and hence easy to store (can use a file folder). And you can get mounting blocks with grid lines (Provo Craft) to help you place your stamps. Autumn Leaves do a great range of clear stamps.


And there it is...hopefully all you need to know to get you started on rubber stamping. Apologies if I have missed anything out and happy stamping!

Note: All photos were downloaded from the relevant websites (was too lazy to take photos of my supplies...much faster this way really and fun since I have been able to upload my photos onto blogger lately).