Showing posts with label Mini Album. Show all posts

Saturday, June 02, 2007

What's a Zutter?

I just recently got a book binding machine called a Zutter from Laine's. Surprisingly, the machine itself is pretty small and portable which makes it pretty nifty. I've always liked the double coil wire binds that we get on diaries and notebooks and with the Zutter you can bind your own books and albums at home. I made sure to call the shop to book one machine for myself and sure enough I heard from Sharon at Laine's that it has been really popular. And when I popped by the shop to get the wire coils, some had already been sold out.


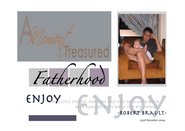
(First two pictures taken from Laine's Diary)

Zutter also produces chipboard covers and inner pages in a variety of sizes 8x8, 6x6, 4x4 and 5x7. Each pack of chipboard cover comes with 20 inner pages that come in cream, black or white colours.

You could also use the Zutter for lots of other stuff like punching holes in a shoe box to make ribbon storage. Check out Laine's post for more info.

Tuesday, April 03, 2007

Mini Accordion Album - Part 2


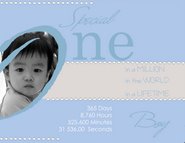
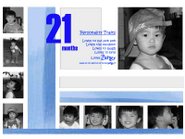
Finally finished the mini album I made at Shabby. Don't mind the shoddy photos...hehe was in a hurry to take the pics and get to bed. I love the embossed paper so much that I was loathe to cover it with too much stuff. There wasn't much space for journalling so I had to hide them behind the photos.


I printed the photos with my Epson R800 photo printer on glossy paper and I was surprisingly pleased with how it turned out. And yes, by that, it means that I have had the printer for almost 3 years (bought from Challenger, Singapore) and have hardly used it. Hee. Unfortunately, I didn't count on the ink of the photos coming off when in contact with even the slightest sticky substance. Aarrgh! I only realized this when I put a rub-on on one of the photos and got a really distressed effect. Haha..it is rather cool actually but the ink also came off when it touched the glazed chipboard pieces on the opposite pages.


Album Materials: Patterned paper: K & Co; Ribbon: American Crafts; Chipboard.

Materials: Textured Cardstock: Bazzill; Patterned Paper: Chatterbox; Chipboard Tag, Glaze and Acrylic paint: Making Memories; Tab die-cut: Quickutz; Sticker: DCWV Quote Stack; Tag Template.


Materials: Shaker Box: Carolee's Creations; Chipboard Flourish, Acrylic Paint and Glaze: Making Memories.

I matted the shaker box on cardstock to match the photo mat.


Materials: Rub-on: Deja Views; 3-Dimensional and Quilled Safety Pins: Stand-Outs by Provo Craft; Die-cut Tab: S.E.I


Materials: Textured Cardstock: Bazzill; Metal Tag: Scrapping Gals; Twist Tie, Chipboard corners, Acrylic paint and Glaze: Making Memories; Die-cut Alphas: Quickutz (Studio Skinni-Mini).


I had a good time making this mini album and very quickly, I managed to record Jay's birth details (on the 1st hidden tag) and the 1st thing people said about him when they saw him (on the 2nd hidden tag). Achieving this has inspired me to create more mini albums to record particular events rather than doing pages and pages. What I figure is great about mini albums like these are that they are very portable (for showing off...hehe), take up very little space (unlike those big 12x12s) and we don't really need lots of embellishments to fill up the spaces, meaning to say less time required and....dare I say it...less spending on new supplies...probably NOT!!! Haha.

Wednesday, March 28, 2007

Mini Accordion Album

Last Wednesday 21st March, I attended the Mini Accordion Album class at Shabby Chic and had a nice time out away from home and the kids for awhile. The class didn't take long and my accordion album was finished in no time at all. This was my first class at making an album and hopefully it won't be my last...hint hint...star book anyone? :-)


The pages of the album was made from cutting a 12x12 piece of patterned paper into 2 strips and then sticking them together at its ends. The folds for the pages were made by scoring with a bone folder. Continuous Glue Lines adhesive (available at Shabby) was used to put the whole album together. The pages of the album was made from embossed paper and is perfect for a children album.


The covers for the album was made by using 2 pieces of 6x6 chipboard and covered with a different patterned paper. Shabby told me that the chipboard can be bought from Bismi or Active Art.


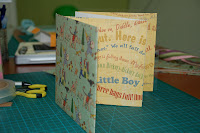
Below is the front of the finished album with the pages opened.


Ribbon (American Crafts) was stuck on the back cover of the album and the back page was then stuck over the ribbon so the album can be tied close using the ribbon. All materials were provided by Shabby including the pre-cut chipboard covers which made assembly of the album really fast and easy. Plus we could choose a coloured cardstock for matting our photos. I chose red but have yet to put my photos in. So watch this space for photos of the fully completed work. Hehe.


A big shout out to Shabby for letting me do the class on my own cos I could not find anyone else to go with me on a Weds afternoon and the minimum for the class was 2 persons.